
Timeline
Open Edit -> Preferences… and select Timeline.
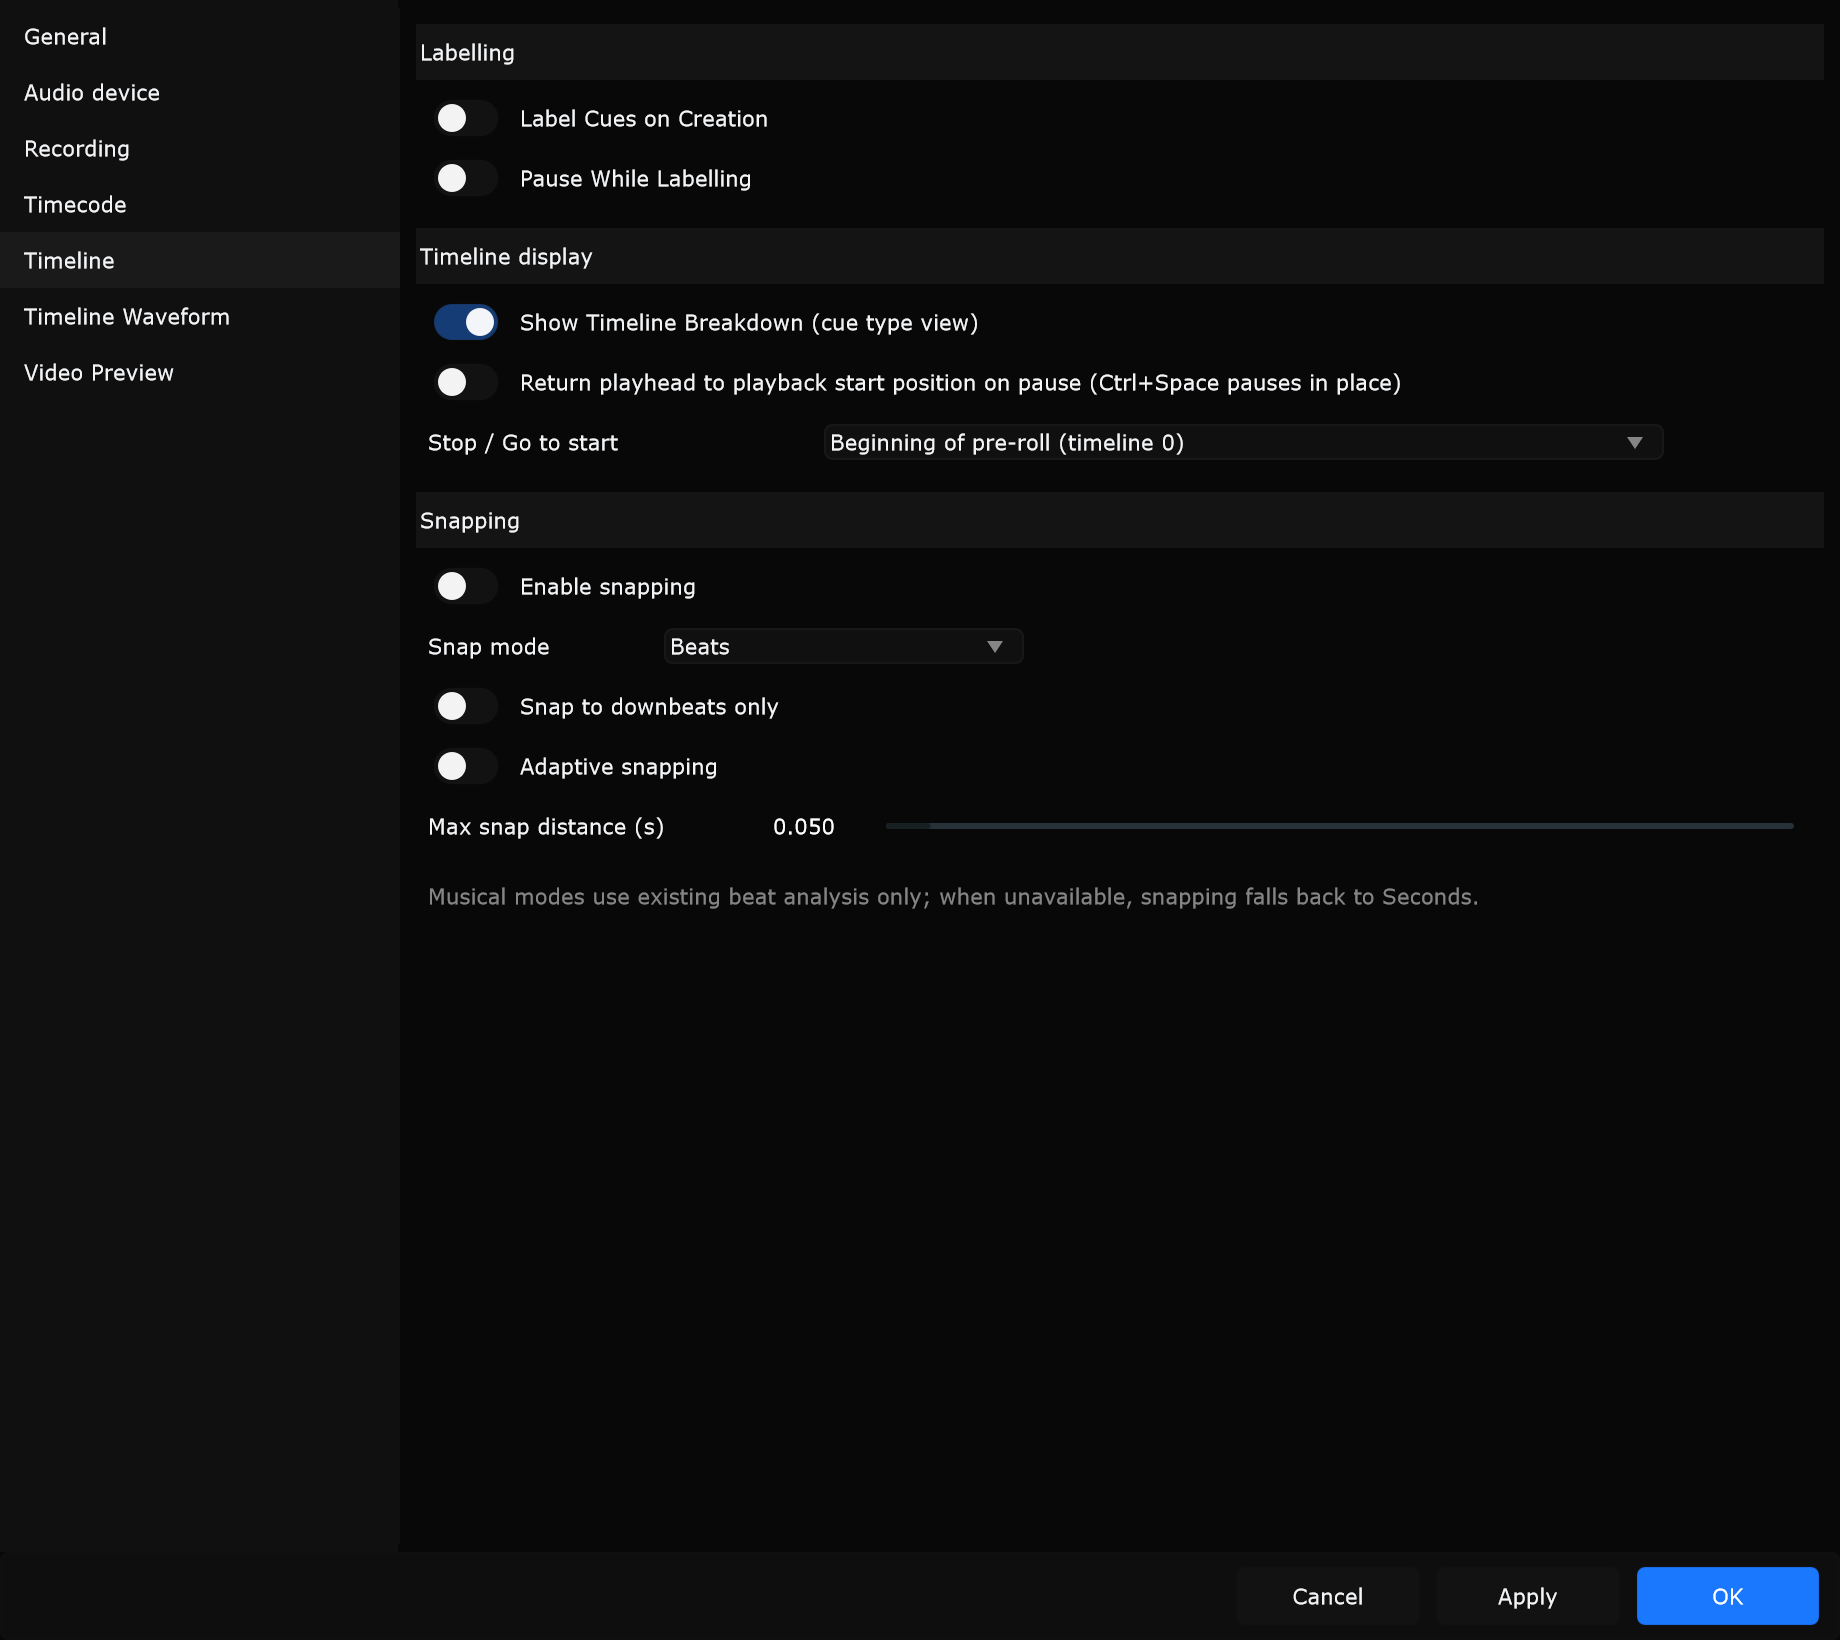
Controls cue labelling on create, timeline display behaviour, and snap grids. Changes apply as you toggle options and move sliders.
Labelling
Section titled “Labelling”Label Cues on Creation
Section titled “Label Cues on Creation”When enabled, Samba prompts you to name a cue as soon as you create it.
When to use: Turn on while building a cue list live against music and you want every mark named immediately. Turn off for rapid marker drops you will rename later in the cuelist.
Pause While Labelling
Section titled “Pause While Labelling”When enabled, transport pauses while you are labelling so the playhead does not run away.
When to use: Enable with Label on Creation during rehearsal so typing a pyro name does not miss the next hit.
Timeline display
Section titled “Timeline display”Show Timeline Breakdown (cue type view)
Section titled “Show Timeline Breakdown (cue type view)”Shows the timeline breakdown / cue-type oriented view when enabled.
When to use: Turn on when reviewing pyro vs lights vs markers by type across the show; turn off for a simpler lane view while editing.
Return playhead to playback start position on pause (Ctrl+Space pauses in place)
Section titled “Return playhead to playback start position on pause (Ctrl+Space pauses in place)”On ordinary pause, the playhead returns to where playback started. Ctrl+Space (Cmd+Space on Mac) still pauses in place without that jump.
When to use: Enable when looping the same eight bars to label hits (Space returns to the loop start). Use Ctrl+Space when you need to freeze exactly on a frame mid-phrase.
Stop / Go to start
Section titled “Stop / Go to start”Where Stop / Go to start lands the playhead.
| Option | Meaning |
|---|---|
| Beginning of pre-roll (timeline 0) | Absolute timeline zero, including pre-roll before program start |
| Program start (0:00) | Show 0:00, which may sit after pre-roll |
When to use: Program start for operators who always reset to the top of the piece. Beginning of pre-roll when you need the full lead-in before first picture or bar one.
Snapping
Section titled “Snapping”Mode-specific options appear only for the selected mode. Musical modes (Beats, Bars, Beat divisions) use existing beat analysis only; when unavailable, snapping falls back to Seconds.
Enable snapping
Section titled “Enable snapping”Master switch. When off, free placement is allowed regardless of mode.
When to use: Leave on for frame- or beat-accurate cueing. Turn off for rough brainstorm marks you will refine later.
Snap mode
Section titled “Snap mode”| Mode | Grid |
|---|---|
| Frames | Video / frame grid |
| Milliseconds | Millisecond step you set |
| Seconds | Whole seconds |
| Beats | Beat analysis of the track |
| Bars | Bar boundaries from beats and Beats per bar |
| Beat divisions | Subdivisions of a beat (1/2, 1/4, 1/8, 1/16) |
When to use: Frames for video notes. Beats / Bars for music labelling after beat analysis. Beat divisions for off-beat SFX. Seconds as a simple fallback.
Millisecond step
Section titled “Millisecond step”Visible in Milliseconds mode. Distance between snap points (1 to 500 ms).
When to use: 10 or 50 ms for fine timing; larger steps for coarse alignment of spoken cues.
Snap to downbeats only
Section titled “Snap to downbeats only”Visible in Beats mode. When enabled, beat mode prefers downbeats instead of every beat.
When to use: Place section markers on bar ones only while ignoring in-between beats.
Beats per bar
Section titled “Beats per bar”Visible in Bars mode. Time-signature count used for bar lines (1 to 12; for example 4 for 4/4).
When to use: Set 3 for a waltz number so bar snaps land correctly.
Beat division
Section titled “Beat division”Visible in Beat divisions mode: 1/2 beat, 1/4 beat, 1/8 beat, 1/16 beat.
When to use: 1/16 beat when spotting fast hi-hat or stutter SFX to the grid.
Adaptive snapping
Section titled “Adaptive snapping”Softens or adapts pull strength toward nearby snap points.
When to use: Leave on for natural drag-and-snap while editing. Turn off if the grid feels too sticky.
Max snap distance (s)
Section titled “Max snap distance (s)”How far an edit position may be from a snap point and still pull to it (0.001 to 1.0 s).
When to use: Keep small when you often place off-grid. Raise it when you want the grid to grab from farther away.